Showing posts with label Gardening. Show all posts

Monday, November 22, 2010

Shade solutions for Melbourne Summer

As plants have started to spring up in our vegie boxes, I've noticed that a number of them that started off quite strong appear to have been scorched by some of the hot days we've had. I'm still getting the hang of Melbourne spring. The weather really is all over the place and when the sun is out it certainly has some bite. I'd put down some mulch, but even with the mulch I noticed that the soil was drying out and getting a hard crust on top, which was causing the young seedlings a bit of trouble.

I'd seen a couple of shade options in the Gardening Australia magazine and TV show that used shade cloth stretched over poly pipe. So with some vague descriptions of this given to the Cunning Plans Dept, we toddled off to Bunnings in search of shade cloth, poly pipe, cable ties and other random bits and pieces.

We ended up getting 50% shade cloth. I'd read somewhere that 30% was the stuff to go for, but the lowest Bunnings had was 50%. Still, I think it will work fine.

The Cunning Plans Dept rigged up some frames using the poly pipe and cable ties.
es.
He drilled through the pipes to tie them together so that they wouldn't shift around each other. The frames just sit inside the vegie boxes and aren't anchored down (we'll see how they go if we get any strong winds).
The shade cloth is simply draped over the frame and pulled down tight by hooking it onto rows of nails on the sides of the boxes. Not high tech, but it works.
It also makes it easy to unhook the shade cloth from any side and pull it back to get to the plants for weeding and watering.
Ta da! Shaded vegie boxes!

To give the plants an extra boos t, I sprinkled some a ll purpose fertiliser and gave them a good soak before putting the cloth back on. Two days later, I checked the plants this morning and they are looking noticeably better. More fresh growth and less burnt leaves. The soil also seems to be retaining the moisture better.

And of course it wouldn't be a proper project if the pups didn't "help" out. Gracie (who loves the shady spot in between the boxes) very helpfully minded the power tools, while Hudson "helped" by eating the plastic lid of the nail container. We'll have to wait and see how "lab-proof" the shade covers prove to be.

Sunday, October 10, 2010

A new vegie patch, in boxes

We've been looking at options for creating vegie patches at our new place that are not permanent, as we're renting and there are no established garden beds and we get the impression that our landlord isn't keen on permanent structures.

We decided on some kind of raising vegie bed, which also has the bonus of being more ergonomic for me to manage. We'd seen these pre-done vegie boxes that were wooden crates filled with soil and pre-planted for around $350. The CPD then spotted someone selling ex-fruit crates for $20 each. We picked up 3 of them (that's what would fit on the ute we hired). We lined them with some builders plastic, with a few drain holes in the bottom.

Next step was to order some soil and mulch. We decided that rather than fill them just with soil, we'd fill the bottom half with mulch, which would drain well and also be a little cheaper than soil.
Yesterday the soil and mulch arrived and we set to work filling up our vegie boxes, with supervision by the dynamic duo - Hudson and Gracie.

Today I planted seeds into the boxes and hopefully we'll be looking at our first Brunswick harvest this summer :)

Sunday, September 26, 2010

Starting a new patch: Seed raising

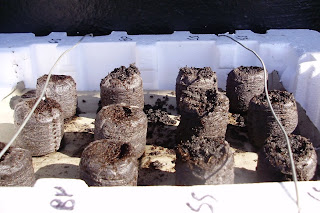
Today I took advantage of the fine weather to get started on some seed raising for what will be the new vegie patch here in Brunswick. I'd nabbed some free shallow punnets at CERES the other weekend and had also saved a couple of other containers. I also decided to try the coir pellets that came in the bundle of gardening stuff I got via Gumtree.
While I was getting to work on the seed raising the Cunning Plans Dept asked the rather pertinent question of "where are you going to put them?". I had initially thought down the side of the house, but that may not get enough sun to keep them warm. The backyard would be better, but required puppy-proofing. The CPD came up with the solution of attaching a shelf to the back wall of the house so I could put my punnets and trays up out of reach of the dogs, but still getting the warmth of the sun.
Voila! Planted in the coir pellets are spaghetti squash, butternut pumpkin and gem squash. In the punnets I've planted another spaghetti squash (I really want to grow these!), some mini capsicums, heirloom tomatoes, eggplant, red Russian kale, apple cucumbers, Lebanese cucumbers and garlic chives. To my dismay I found about half the spaghetti squash seeds I'd saved had gone moldy. I'm airing them to see if I can dry them out a bit more. I think I may need to get some of those moisture absorbing sachets to put in my seed box.

I also potted out the continental parsley and mint I picked up a month ago. The parsley punnet actually had 3 plants in it, so I've planted them out separately and hopefully they'll grow nice and bushy.
There is also movement on the small strip of garden by the side of the house that I'd dug over and planted a month or so ago. The row of marigolds have sprouted, as have 4 of the lettuce, one of the dwarf snow peas, and some of the spring onions (and a bunch of weeds, but I'll get to those soon).

It may be getting close to the end of September, but it is finally starting to feel like Spring is arriving. Buds are bursting on trees and we're starting to see the sun for more than a fleeting moment. After having just experienced my first Melbourne winter, I really appreciate the coming of Spring :)

Monday, September 13, 2010

Thrifty Gardening: Urban pots and herbs

While we were walking up to the local primary school to vote a few weeks ago, we saw a good size plastic pot abandoned amongst other rubbish near the pedestrian bridge over the freeway. I made a note to pick it up on our way back home as I need pots. At the school, post-voting, we noticed that CERES had set up a little stall selling seedlings and potted herbs. I picked up a mint and a continental parsley for $5, which I thought was a bargain (granted the parsley was cheap because it looked a bit straggly).


I also discovered that CERES have a free pot recycling bin at their nursery, where you can nab used pots and then bring back any you aren't using anymore. And their shop sells a number of bulk goods (food and cleaning products) by weight. You can BYO container or use some of the recycled containers or paper bags they have at the store.

We popped in on the weekend to stock up on some eco-friendly dishwasher powder (is anyone else disappointed that it is hard to get eco-friendly dishwasher powder in the major supermarkets? My local Coles stocks eco-friendly dishwasher tablets, but our little dishwasher drawer doesn't need much). And since I'm now on the exclusion diet from hell, I also grabbed a paper bag and stocked up on some quinoa, before heading to the cafe to get a soy dandy. I also love that the market has "Puppy Parking" (i.e. a place just outside the market where you can tether your pooch while you shop), though I'm not sure I'd trust our dynamic duo not to wreak havoc. We exited via the nursery and pot bin to get a few medium pots to pot on my herbs and some small trays to get some seed raising going.

I love Brunswick :)

Sunday, August 15, 2010

Thrifty Gardening: Free seeds and fertiliser

Continuing with the sustainable and thrifty living concept, I've set myself a challenge to establish a garden at our new place without spending any money if possible.

We brought with us our collection of seeds and tools, so that's our starting point. The things we had to leave behind included our fertilisers and pots.

So I've been looking out for possible freecycling options to replenish our stocks. I saw an ad on Gumtree from someone giving away a box of fertiliser and assorted seeds. I replied and on Monday popped into town on my way back from a meeting to pick it up. Talk about a good haul of freebies! I'm so glad I brought my fold-up trolley otherwise I would have really been stuffed trying to get it home on the tram.

Check this out:

The fertiliser etc.. includes:
  • Richgro Premium complete fertiliser plus 5kg bag
  • Naked Farmer Organic Soil Activator sample pack
  • Hortico All purpose compound fertiliser 500g tub (open)
  • Brunnings Tomato & Vegetable Starter fertiliser 1kg tub
  • Jiffy small peat pellets 12
  • Water storage crystals 250g far (1/2 full)
  • Miracle Gro Seafeed 3 in 1 250ml
  • Charlie Carp 500ml
  • Yates Thrive Shake 'n' Feed 700g (1/2 full)
  • Garden ties 15
  • Brunnings Rose Planting Mix coir block (open)
  • Seasol 20ml sachet
  • Eco-cweed 5g sachet
  • Rainsaver crystals 10g sachet
  • Searles Penetraide re-wetting granules 2 x 40g sachets
  • Searles Flourish soluble plant food 3 x 20g sachets
The assorted seeds includes:
  • Cucumber Lebanese (open)
  • Snapdragon
  • Tomato Roma (open)
  • Dwarf snapbean (open)
  • Sunflower
  • Pak Choi (open)
  • Broccoli Royal Dame (open)
  • Beetroot Perfect (open)
  • Spinach Emerald Star (open)
  • Squash Gem
  • Lucerne (open)
  • Eggplant Listada di Gandia
  • Peanut Virginia
  • Okra x 2 (open)
  • Miscellaneous bag that appears to have a mix of coriander, pumpkin and possibly spring onion)
Not bad for free, eh?

Wednesday, July 28, 2010

Farewell Figtree

Well it seems like it was only a few months ago that we made the decision to move to Melbourne, but today seems to have come around fast.

Today we said farewell to Figtree. I was hoping to take some final photos of the garden, but it decided to absolutely bucket with rain (not helpful for the removalists trying to pick the truck). At least it meant I didn't have to water the garden before we went. So sadly, no parting photos.

Yesterday I did some maintenance on the vegie patch to get it ready for being unattended for a while. All the beds are mulched. The new irrigation timer has been installed and set. All the plants are looking healthy. The snow peas are just starting to reach the twine that they'll eventually climb. The broccoli heads are forming nicely. It is finally looking like a well established, mature garden. I would like to hope that it will bring joy to the future occupants.

I don't find myself missing the garden, as I've enjoyed the process of gardening as much as the end product. I would have liked to have seen the fruit trees mature and start to bear fruit. I'm looking forward to the challenge of starting a new garden in Melbourne. I'm bringing our seeds with us, many of which we've saved from what we've grown in Figtree, so it will be like bringing a bit of our Figtree garden with us.

Wednesday, March 3, 2010

Van Gogh Vision: Sunflower Summer

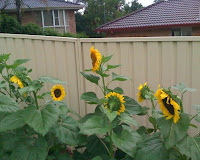
A few months ago I had this idea - a Van Gogh inspired vision - of sunflowers along the back fence. I had seeds for both Giant Russian and Yellow Pollenless sunflowers and planned a double row, with the 3-4m tall Giant Russians at the back with the shorter 1.5m tall Yellow Pollenless in front. I could picture the magnificent image in my head so clearly.


The first issue I encountered was a logistical issue. Our back fence has been steadily falling down, not helped by the fact that our two dogs and the dog that lives behind us like to try and play together and scratch and push at the palings. So we had a chat to the people behind us and agreed to replace the aging wood paling fence with a colorbond fence. Which meant that I needed to hold off planting anything in front of the back fence until it had been replaced (unless I wanted my sunflower seedlings trampled).

The fence got replaced around the end of November. Here we have old fence and new fence:

We asked the fence guys to leave the old palings in our yard. We plan to reuse them to make a nicer vegie patch and compost area fence.

The planting was done in an afternoon in December. First we mowed the strip along the back fence. As the soil is heavy clay, we decided to dig holes and fill them with compost to get the new seeds a good start on life.

After the seedlings started to emerge, we realised that they were at risk of getting squashed or trampled by the dogs, so I made some wire mesh collars to give the ones in prime "trampling" zones a little bit of protection. Then as they were also getting some stiff competition from the grass, we started to mulch around them using wet newspaper to smother the grass first before laying the mulch on top. Unfortunately we only had enough mulch to half the row, so it looked a bit odd for a few weeks.

By the end of January the sunflowers were starting to bloom and were looking gorgeous. Once we got another trailer load of mulch, courtesy of Mum & Dad having some trees lopped and a gigantic pile of mulch, we finished mulching the row around the end of February.


Once open, the sunflowers were truly beautiful to behold. The bees certainly loved the big giant russian flowers. The yellow pollenless put out little mini sunflower side shoots, often with "double-heads".

Sadly our sunflower joy was rather short-lived. The first issue was that the sunflowers seemed to struggle to hold up the weight of their heads. We're not sure if this is a nutrient deficiency or perhaps we were growing them at the wrong time of year. The giant russians in particular needed some propping up (or perhaps a hug), while the rest just looked a bit droopy and depressed. And on overcast days, they seemed a bit confused about which way to face.


Then we discovered we weren't the only ones who enjoyed sunflowers. The local population of sulphur-crested cockatoos had discovered the tasty buffet in our backyard, We thought of the Woolworths ad when the the woman yells to her husband "Stavros!" when the cockatoos are on their vegie patch. Sadly the back fence was a bit too far away from our kitchen window to rig up a scare mechanism (though the CPD was tempted to try), so we tried training Hudson to chase the cockatoos off the flowers by yelling "Stavros!" out the window. Can't say it worked particularly well, though once pointed out, he gave a good show of chasing them.
And while the cockatoos started the demise of our sunflowers, their fate was doomed once the dogs discovered that sunflowers are tasty and jumping up, grabbing the heads, and pulling them out of the group or snapping them off was a great new game.

One by one, our sunflowers succumbed to our playful pups. What can I say? It was fun while it lasted and I'd probably do it again :)

The end.

Tuesday, September 29, 2009

Garden Challenges: Strong Winds

Wollongong can be a bit of a windy place, especially at certain times of the year. We're fortunate that we don't tend to be as exposed to the wind as other places due to being on a hill and the backyards on either side of us are higher, giving us a little bit of protection.
However the two days of strong winds last week were certainly exceptional. First was the red dust storm on 23/9 and then the buffetting winds on 26-27/9.

We only suffered one main garden casualty with the winds, which was the snow peas. They simply couldn't hang on to the vegie patch fence with those strong winds. Most of the upper stalks snapped and fell over. I went down to the patch yesterday and trimmed off all the broken stalks. One plant had broken right down to the ground. The other four plants appear to still have some new shoots forming lower down below all the breakage, so I'm hopeful we may still get a bit more life out of them.

Surprisingly, the broccoli seedlings survived, despite no real protection. The young fruit trees also seem to have survived, though the leaves on one of the apples have all wilted and shrivelled, but I think it was doing that before the dust and wind. Hopefully it will come good. And the apple that I had suspected was dead as it showed no sign of life while the other four were growing leaves and flowers, it has a tiny bit of green showing in the top bud.

Sunday, September 20, 2009

Operation Potato Patch

We love spuds, so there was no question that our vegie patch plan would include spuds and lots of them. In anticipation of great mounds of spuds, I eagerly bought a "gourmet combo" of seed potatoes. The pack included six varieties, each with around 8 tubers. The Kipflers and the Nicolas went to Dad as we was keen to give those a go. That left us with the remaining 4 varieties (Desiree, Kind Edward, Royal Blue, and Cranberry Red), or 32 tubers.

Now here is where doing the maths before getting too carried away would have helped. According to a variety of sources, our seed tubers needed to be planted in rows 40-80cm apart with 25-40cm between the spuds along the rows. The packets the seed tubers came in recommended 40cm x 40cm. Now 32 tubers at those spacings meant we were pretty much looking at not only an entire bed, but a bed larger than any of our existing ones. Since we've been thinking about extending the vegie patch down the hill and adding an extra bed anyway, we figured that a no-dig potato patch would be a great way to start.

Preparation and materials
Because gardening in our backyard involves lab-proofing, we needed to figure out what we would use as a barrier around the new patch. The long term plan is that we would use the 2 pool fence panels from the old vegie patch to extend the new vegie patch. However, we're not ready to move those yet so we needed an interim measure. We decided to go with chicken wire.

The no-dig method involves layers of straw, manure, and compost, plus a bit of blood & bone. We already had a good amount of compost and some blood & bone, but needed to buy straw and manure. A trip to Bunnings later and we had 8 bags of pulverised cow manure, 3 bales of sugar cane mulch, and a 10m roll of chicken wire.

Constructing the potato patch
A no-dig patch, as the name suggests, involves no digging. Given our horrible heavy clay soil that is full of rocks, we're a fans of no digging. However, we did need to mow the grass and weeds down, which also served to mark out the area.
While the patch will mostly be a "mound", due to the slope of our yard, we needed something along the lower edge to stop the whole mound slowly sliding down the hill. We re-used some edging from one of the old vegie beds.

To try and keep the kikuyu and weeds at bay around the edges of the bed, we laid down wet newspaper. Unfortunately we didn't have enough to cover all the bits we wanted to, so we will have to add to it later.

The fence was the next thing to go up. The Cunning Plans Dept made some stakes out of branches from the old tea tree and we stretched the chicken wire around the patch, leaving a "gate" at one end.

Next was the layering. Normally with a no-dig patch, you could put the seed potatoes straight on the ground and pile the layers on top. As our ground is hard clay, we figured we'd give our spuds could use a layer between them and the soil.

First we sprinkled a generous amount of gypsum over the ground, which will help break up the clay. Next was a layer of one bale of sugar cane mulch and 4 bags of cow manure mixed up.

The seed potatoes were laid out on this layer, which was ~6-7cm deep. Due to a slight glitch in my mathematical abilities, we had to adjust our layout a bit, but ended up with 3 rows with 9 spuds in each row, with spacing ~40cm x 25cm. I did at least remember to make a note of what we planted where in my garden diary. This, you will note, is only 27 spuds. As it turned out, we only had 30 tubers and I'd previously bought 3 "grow bags", so the leftover 3 spuds went in those.
We then continued with the layers. Sugar cane mulch, then the rest of the cow manure, blood & bone, then more sugar cane mulch, then a layer of compost, and finally a bit more sugar mulch on top. We'd been progressively watering in the heap as we went. Fortunately, the weather decided to be helpful and just as we finished the final layer, the skies opened and we got a brief downpour. I still gave it a bit of Seasol after the rain for good measure.
The final step was to stake the bottom edge of the chicken wire and rig up a bit of plywood (re-cycled from the old dog kennel) as a gate. Voila! One potato patch.


Recap and lessons learnt
We didn't really have an idea of how much manure and straw we would need, but as it turned out we needed more than we got. Ideally, we would have liked to have had the heap at least 30cm deep, but it's probably more around 20-25cm deep. As we will need to keep adding to the heap as the potatoes poke up through the top, we're going to need to get much more straw and manure. Total depth will need to be 50-60cm.

While we like growing our own food for the joy of it and also to grow varieties you can't get commercially, we also like to look at the cost breakdown of growing our own vs buying from the local fruit & veg store. For reference, the rough costs:
  • 8 bags of cow manure - $44, will need more so add another 10 bags @ $55
  • 3 bales of sugar cane mulch - $36, will need more so add another 3 bales @ $36
  • 10m roll of chicken wire - $25
  • Seed potatoes - $22
  • Grow bags - $13

That's a total of ~$230. If we have good yields, that will be ~1kg per plant, so 30kg of spuds. Current spud prices are ~$2-3/kg for bog standard spuds, and ~$4-5 for "gourmet" varieties, so we could grow maybe $90-110 worth of spuds.

However, much of the costs are because we're starting a bed from scratch, which we won't need to do in future seasons as this bed will become part of the rotation. Next season, we will only need maybe 1/4-1/3 of the straw and manure and can use potatoes from this crop as seed tubers for the next (providing no diseases strike the patch). Next year, we could only be looking at ~$50 on materials for $90-110 worth of spuds. We're also not going to get varieties like the Royal Blue or Cranberry Red at the local fruit & veg.

In terms of time, the whole exercise took the two of us from around 10am to 3pm (with an hour break in the middle for lunch). The absence of digging meant that than heaviest labour was really moving the bags of manure and strewing them over the bed.